3.3. ASGARD Agent Deployment
In order to register a new endpoint to the ASGARD Management Center, download and install the ASGARD Agent on the system you want to register.
The ASGARD Agent can be directly downloaded from the Management Center
login screen through the button Download Agent Installers. A list
of available agents for various operating systems appears.
Hint
You can disable the downloading of agents on the login screen. Please see Advanced Settings.
Download Agent Installers from Login Screen
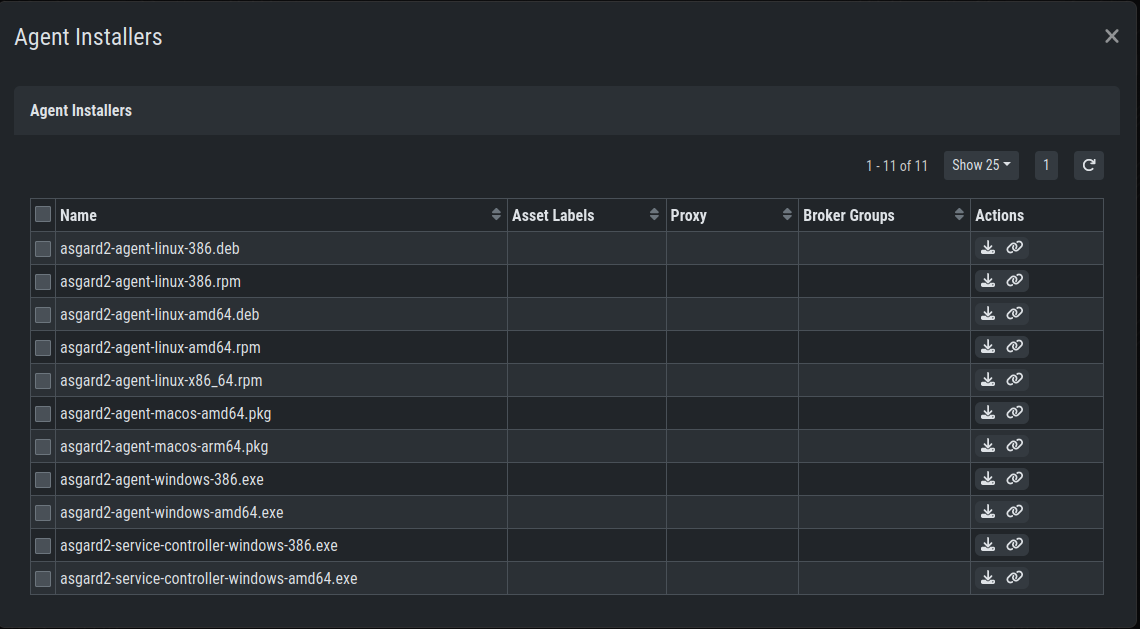
Agents Overview
After the installation, the endpoints will connect to your Management
Center, register automatically and appear in the Asset Management Section
in the tab Asset Requests. Please allow two or three minutes for systems to show
up. The agents use the FQDN to connect to your Management Center, so ensure that
your endpoints can resolve and reach the Management Center via FQDN.
Note
Full administrative privileges are required for the ASGARD agent and THOR to operate properly.
In the requests tab, select the agents you want to allow on your Management
Center to manage and click Accept Asset Requests. After that, the
endpoint shows up in the assets overview and is now ready to be managed and scanned.
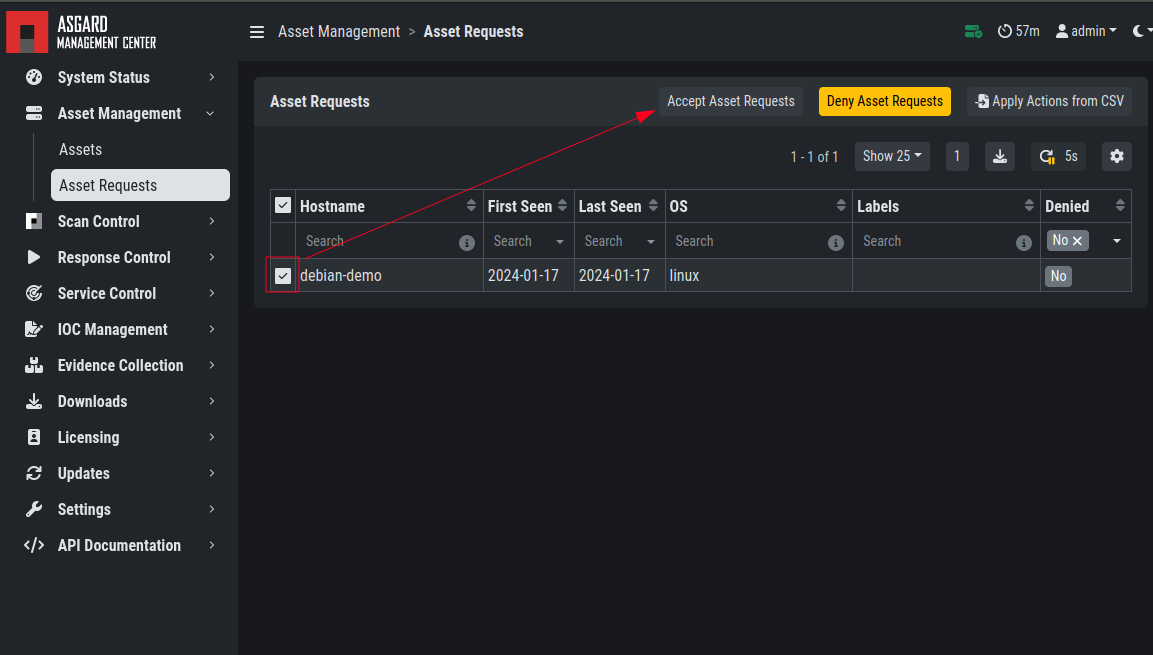
Accepting ASGARD Agent Requests
A registered agent will poll the Management Center at a given interval between 10 seconds and 10 Minutes – depending on the number of connected endpoints (see Performance Tuning for details). If your Management Center has scheduled a task for the endpoint (for example: run THOR scan) it will be executed directly after the poll.
3.3.1. Windows Agent Deployment
Since the Agent Installer for Windows is a normal .exe file and not a
.msi file, you need to write your own scripts to deploy the agent via
your management system of choice. We have written an example script in
PowerShell, which should work for most of the tools. Please see the section
Installing ASGARD Agent via Powershell Script and
Deploy ASGARD Agents via SCCM.
Alternatively, if you want to deploy the ASGARD Agent manually, you can just execute the installer by hand.
3.3.2. Linux Agent Deployment
To deploy the ASGARD Agent on a linux system, you can use the following commands:
user@unix:~/Downloads$ sudo dpkg -i asgard2-agent-linux-amd64.deb
user@unix:~/Downloads$ sudo rpm -i asgard2-agent-linux-amd64.rpm
You will be able to deploy your agents via most of the common linux tools, just make sure that the installer is being installed with administrative privileges.
3.3.3. macOS Agent Deployment
Starting with macOS Big Sur (v11.0), Apple requires software developers to notarize applications.
Due to the nature of the asgard2-agent installer, which is generated
during installation time on your Management Center, and making it unique
for each Management Center installation, it iss currently not possible
to notarize the installer.
This document aims to describe possible workarounds, intended to be a
reference for IT administrators or IT packaging teams to bypass Apple
verifications and install the personalized asgard2-agents on macOS
Big Sur (or newer) workstations.
Warning
Executing any of the workarounds described in this document puts your system at risk for a short period of time. This document will deactivate global security mechanisms of the operating system, which are intended to protect the integrity of the system. Please make sure to follow the below steps carefully and enable those security mechanisms after you are done.
Please always keep in mind to check your system after performing any of the described actions, to ensure that all security mechanisms are in place and are re-activated after performing the described actions.
Please follow the below steps to install the ASGARD Agent on macOS.
Open a new terminal session
Deactivate macOS Gatekeeper
sudo spctl --master-disable
Close the terminal and open a new terminal session
Install the asgard2-agent
sudo installer -pkg /path/to/asgard2-agent-macos-amd64.pkg -target /
Close the terminal and open a new terminal session
Reactivate macOS Gatekeeper
sudo spctl --master-enable
Warning
Make sure to activate the macOS Gatekeeper once you are done:
sudo spctl --master-enable
You can verify the state of the macOS Gatekeeper with:
MacBook-Pro:~ nextron$ spctl --status
assessments enabled
On a system with activated Gatekeeper, the output has to be assessments enabled.
3.3.3.1. macOS Full Disk Access
Since macOS Ventura (v13.0) the ASGARD Agent needs full disk access to function properly. After you have deployed the ASGARD Agent, you need to grant the service the required access permissions. Please keep in mind that administrative privileges on the machine are needed to perform this change.
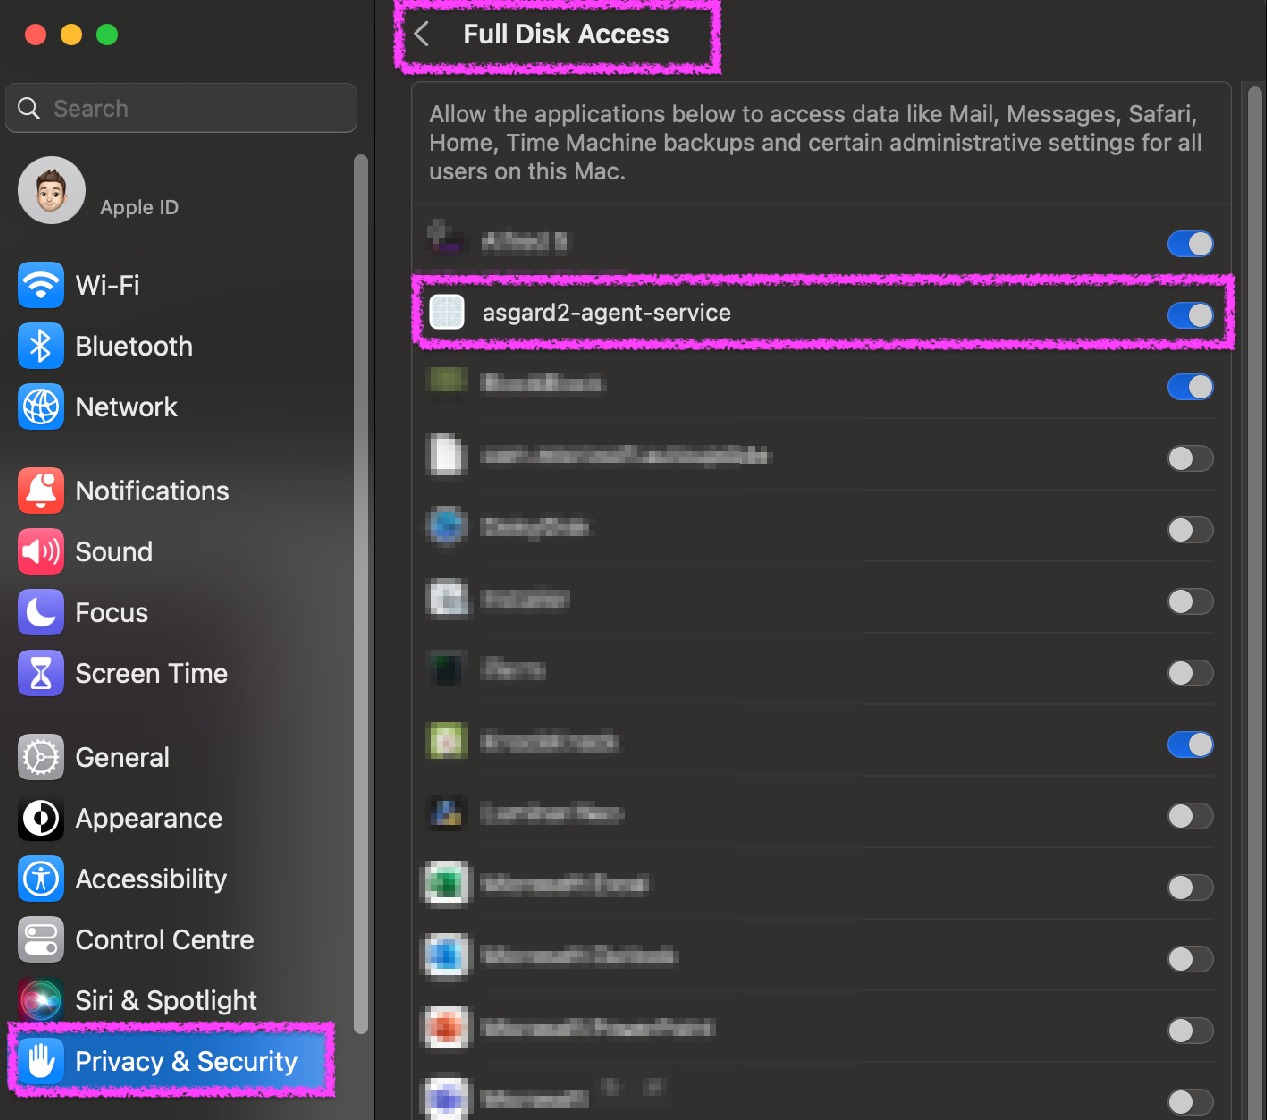
To do this, navigate on your Mac to System Settings > Privacy &
Security > Full Disk Access:
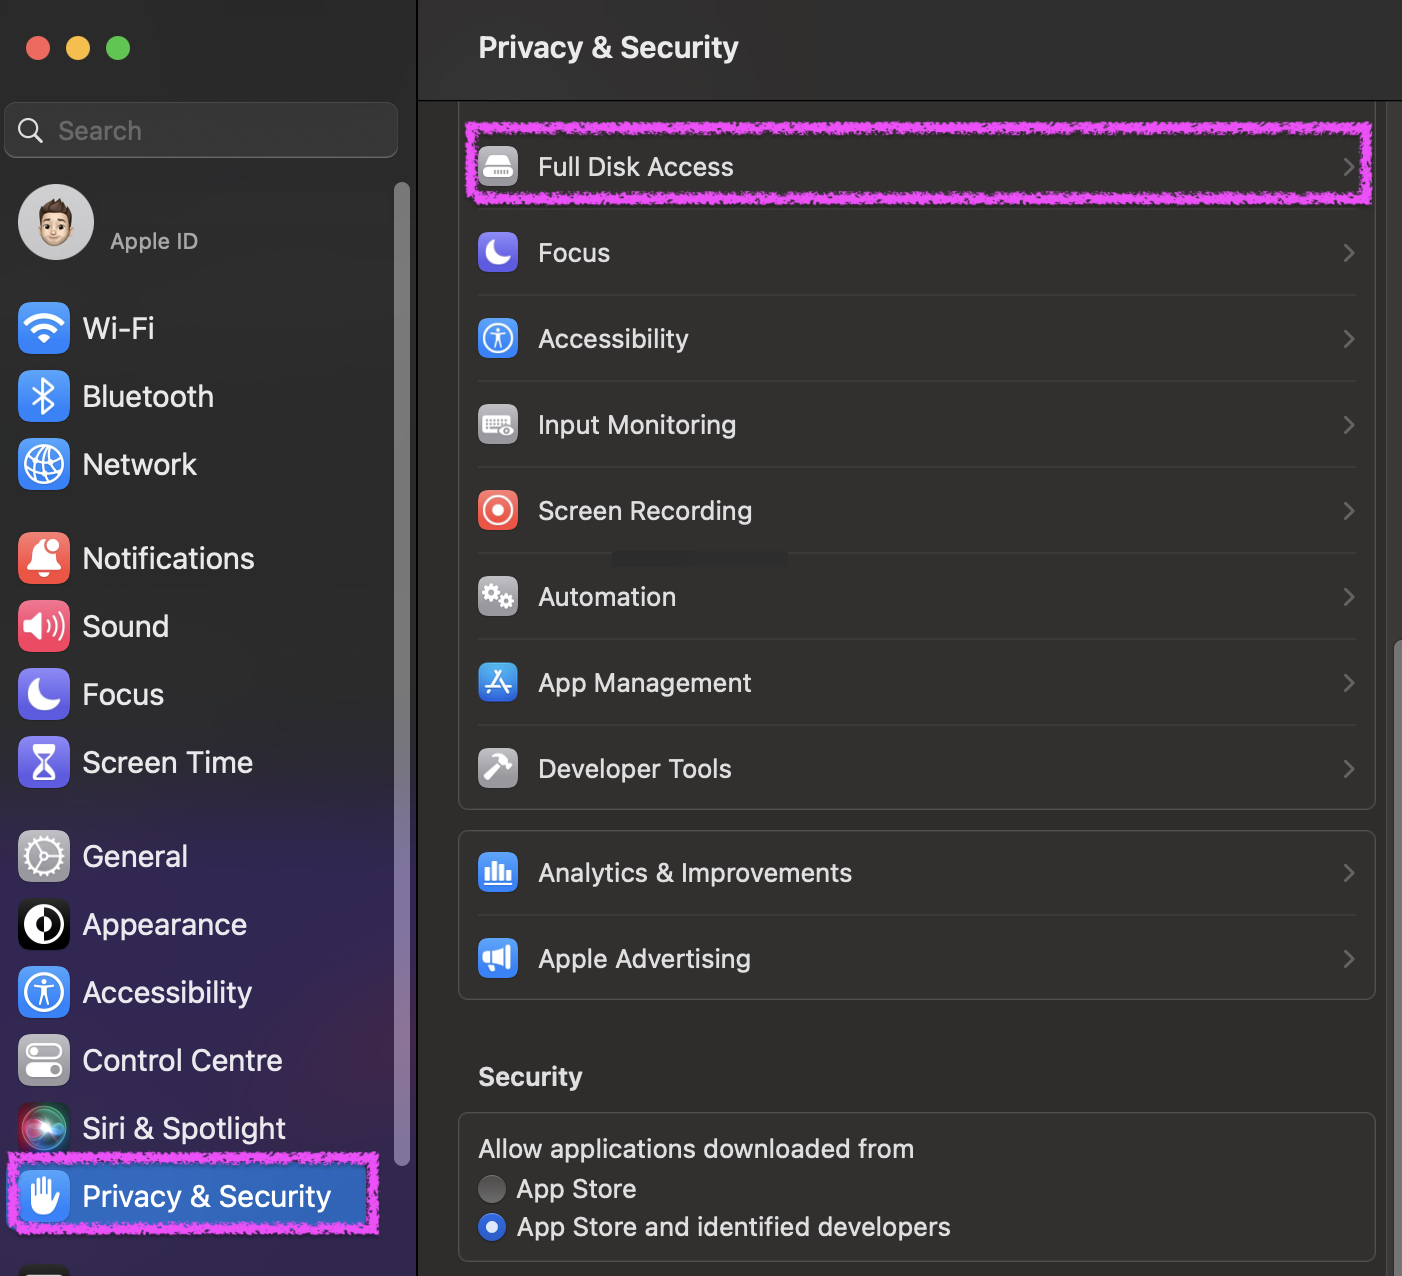
You need to enable the asgard2-agent-service slider:
Note
There is no workaround to this step, since it is an integral
part of the security design of Apple devices. If you are having trouble
with THOR scans via ASGARD on macOS, please check if the Full Disk
Access permission for the ASGARD agent was granted. Since macOS Mojave
(v10.14), you need to grant the same permissions to removable volumes,
if you plan on scanning those.