3.20. User Management
Access user management via Settings > Users. This section
allows administrators to add or edit user accounts.
The field 2FA in the overview indicates if a
user has Two Factor Authentication enabled or not.

Add User Account
Editing a user account does not require a password although the fields are shown in the dialogue. An initial password has to be provided for user creation, though.
Access the user roles in Settings > Roles.
You can download a list of all users in CSV format.
3.20.1. Roles
By default, ASGARD ships with the following pre-configured user roles. The pre-configured roles can be modified or deleted. The ASGARD role model is fully configurable.
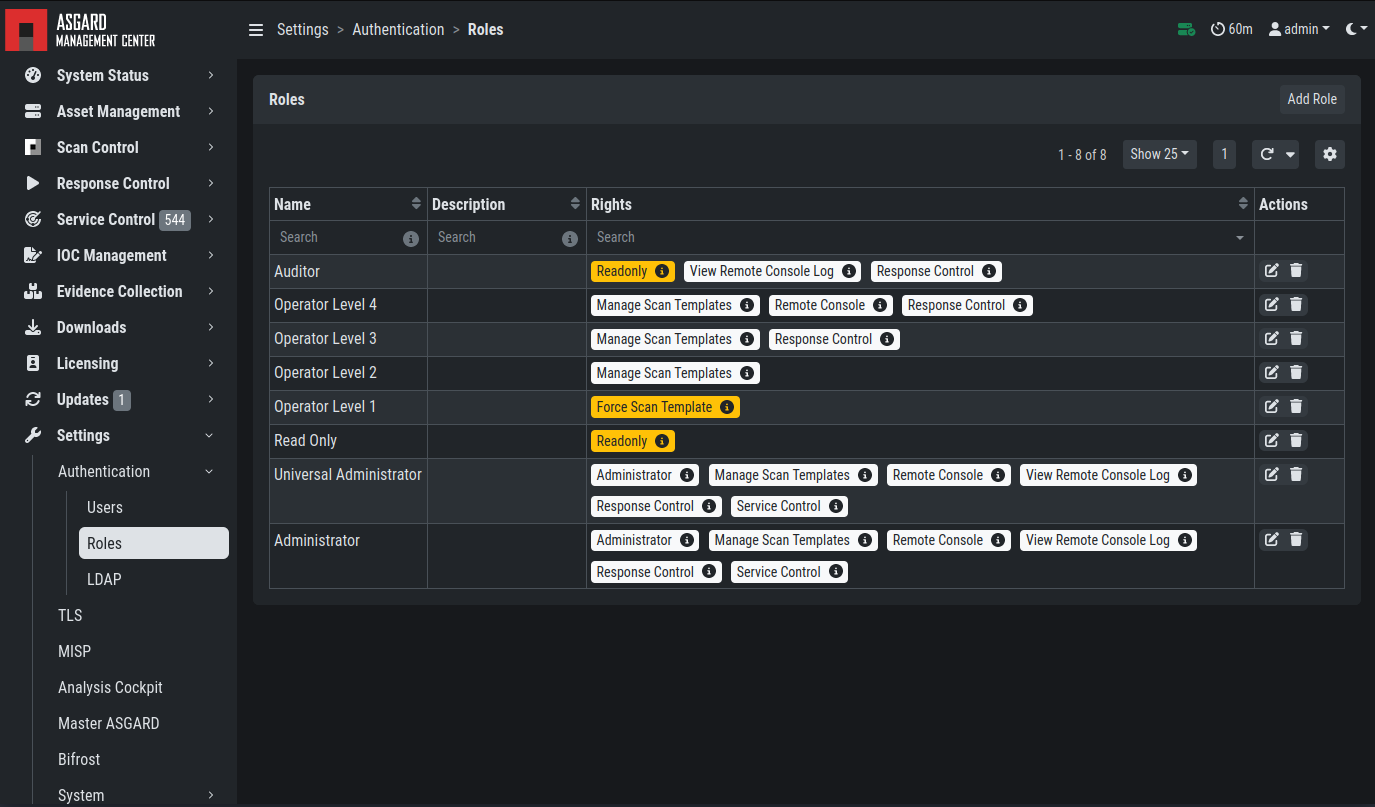
User Roles – Factory Defaults
Note that all users except users with the right Readonly have the right to run scans on endpoints.
The following section describes these predefined rights and restrictions that each role can have.
3.20.2. Rights
Role |
Permissions |
|---|---|
Administrator |
Unrestricted |
Manage Scan Templates |
Allows scan templates management |
Remote Console |
Connect to endpoints via remote console |
View Remote Console Log |
Review the recordings of all remote console sessions |
Response Control |
Run playbooks, including playbooks for evidence collection, to kill processes or isolate an endpoint |
Service Control |
User can manage services on endpoint, e.g. Aurora |
3.20.3. Restrictions
Role |
Restrictions |
|---|---|
Force Scan Template [2] |
Force user to use predefined scan templates that are not restricted |
No Inactive Assets [2] |
Cannot view inactive assets in asset management. |
No Task Start [2] |
Cannot start scans or task (playbooks) |
Readonly [2] |
Can't change anything, can't run scans or response tasks. Used to generate read-only API keys |
3.20.4. LDAP Configuration
In order to configure LDAP, navigate to Settings > LDAP.
In the left column you can test and configure the LDAP connection itself.
In the right column, the mapping of LDAP groups to ASGARD groups
(and its associated permissions) is defined.
First check if your LDAP server is reachable by ASGARD by clicking "Test Connection".
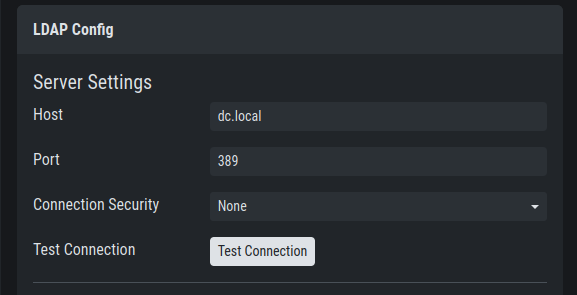
Configure the LDAP Server
Then check the bind user you want to use for ASGARD. Read
permissions on the bind user are sufficient. To find out
the distinguished name you can use an LDAP browser or query
using the PowerShell AD module command Get-ADUser <username>.
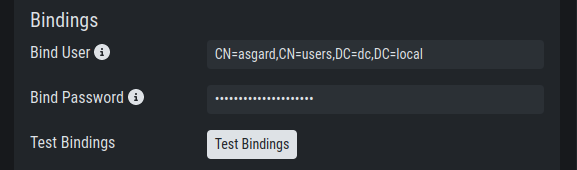
Configure the LDAP Bind User
Next configure the LDAP filters used to identify the groups and users and their preferred attributes in your LDAP structure. A default for LDAP and AD in a flat structure is given in the "Use recommended filters" drop-down menu, but you can adapt it to your liking. The test button shows you if a login with that user would be successful and which groups ASGARD identified and could be used for a mapping to ASGARD groups.
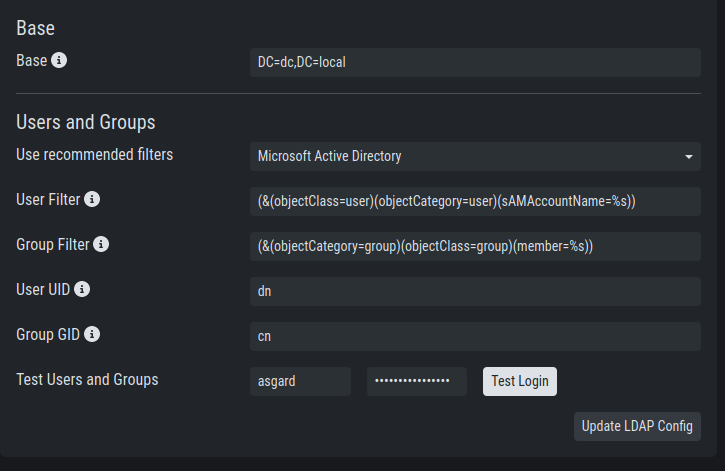
Configure the LDAP User and Group Filters
If you need to adapt the recommended configuration or want to customize it,
we recommend an LDAP browser such as ADExplorer
from Sysinternals to browse your LDAP structure. As an example you could
use your organization's e-mail address as a user login name if you change the "User Filter"
to (&(objectClass=user)(objectCategory=user)(userPrincipalName=%s))
Note
You need to save the configuration by clicking Update LDAP Config.
Using the test buttons only uses the data in the forms, but does not
save it, so that you can use it for testing purposes anytime,
without changing your working configuration.
After the LDAP configuration is set up, you need to provide role mapping from LDAP groups to ASGARD groups.
This is done in the right column by using the Add LDAP Role feature.
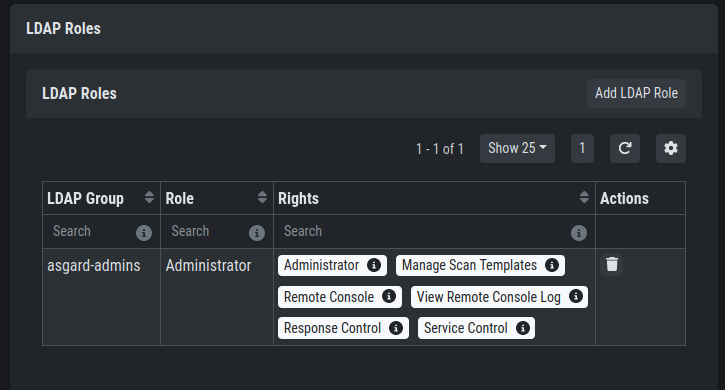
LDAP Group to ASGARD Role Mapping