3.11. Response Control
The Response Control is used to execute tasks on your agents. Those tasks can be:
Run Playbook (pre-defined or custom)
Run Interrogate (collect system information)
Open Remote Console
Maintenance
Upgrade Agent
Upgrade Service Controller
Configure the asset's proxy
Move asset to another ASGARD
3.11.1. Opening a Remote Console on an endpoint
In order to open a remote console on an endpoint, open the Asset Management section and click the "command line" button in the Actions column.
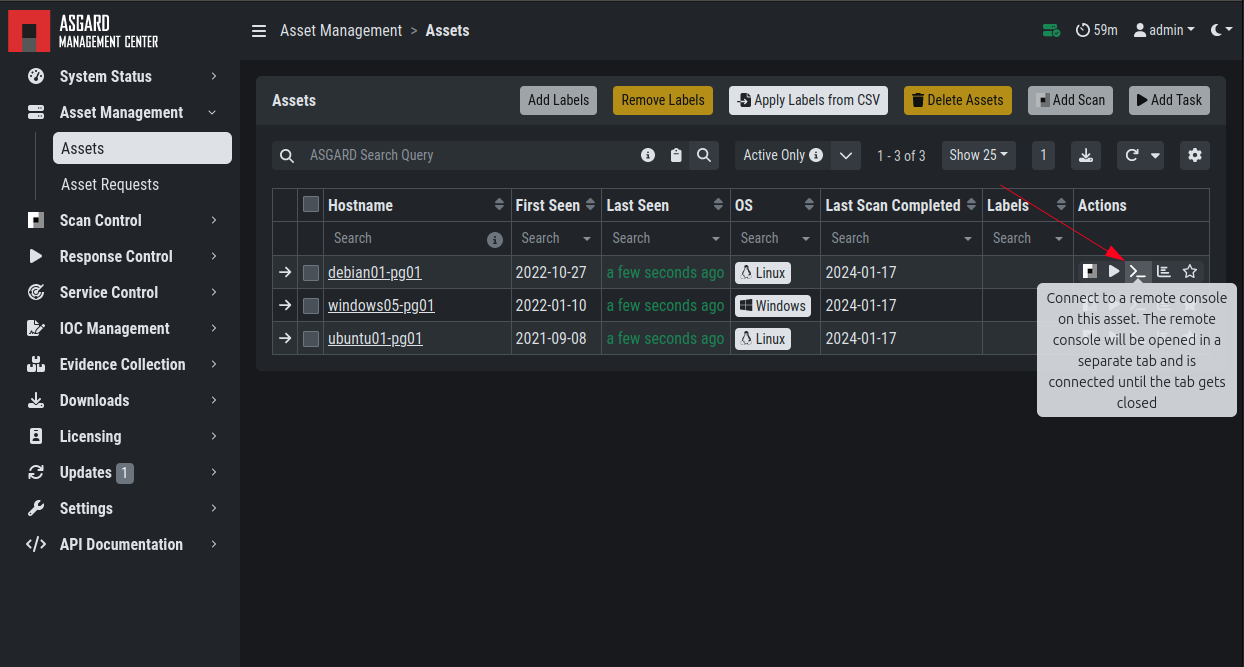
Opening a Remote Console from the Asset View
Depending on your configuration it may take between 10 seconds and 10 minutes for the remote console to open. Please note that all actions within the remote console are recorded and can be audited. All consoles open with root or system privileges.
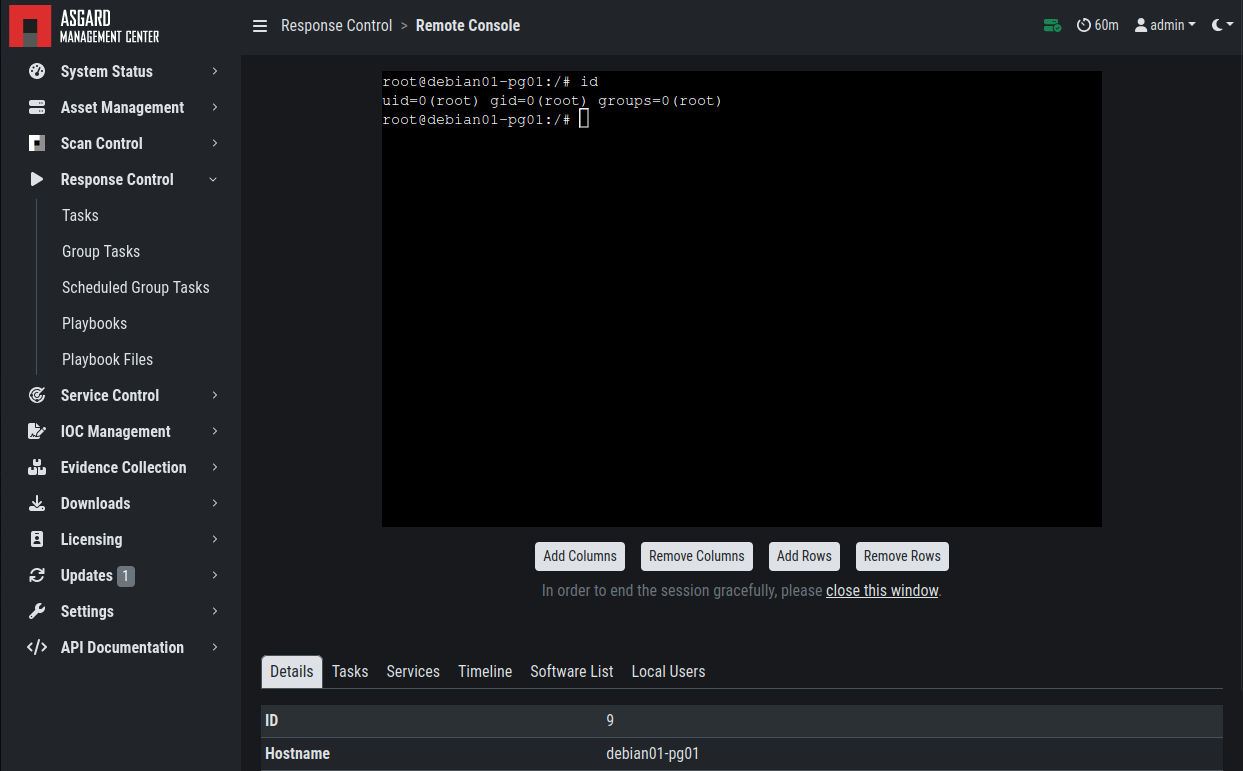
Remote Shell
In order to replay a remote console session, navigate to Response Control,
expand the task that represents your session by clicking the arrow to the left
in the tasks row. Select the Console Log tab and click the play button in
the bottom row.
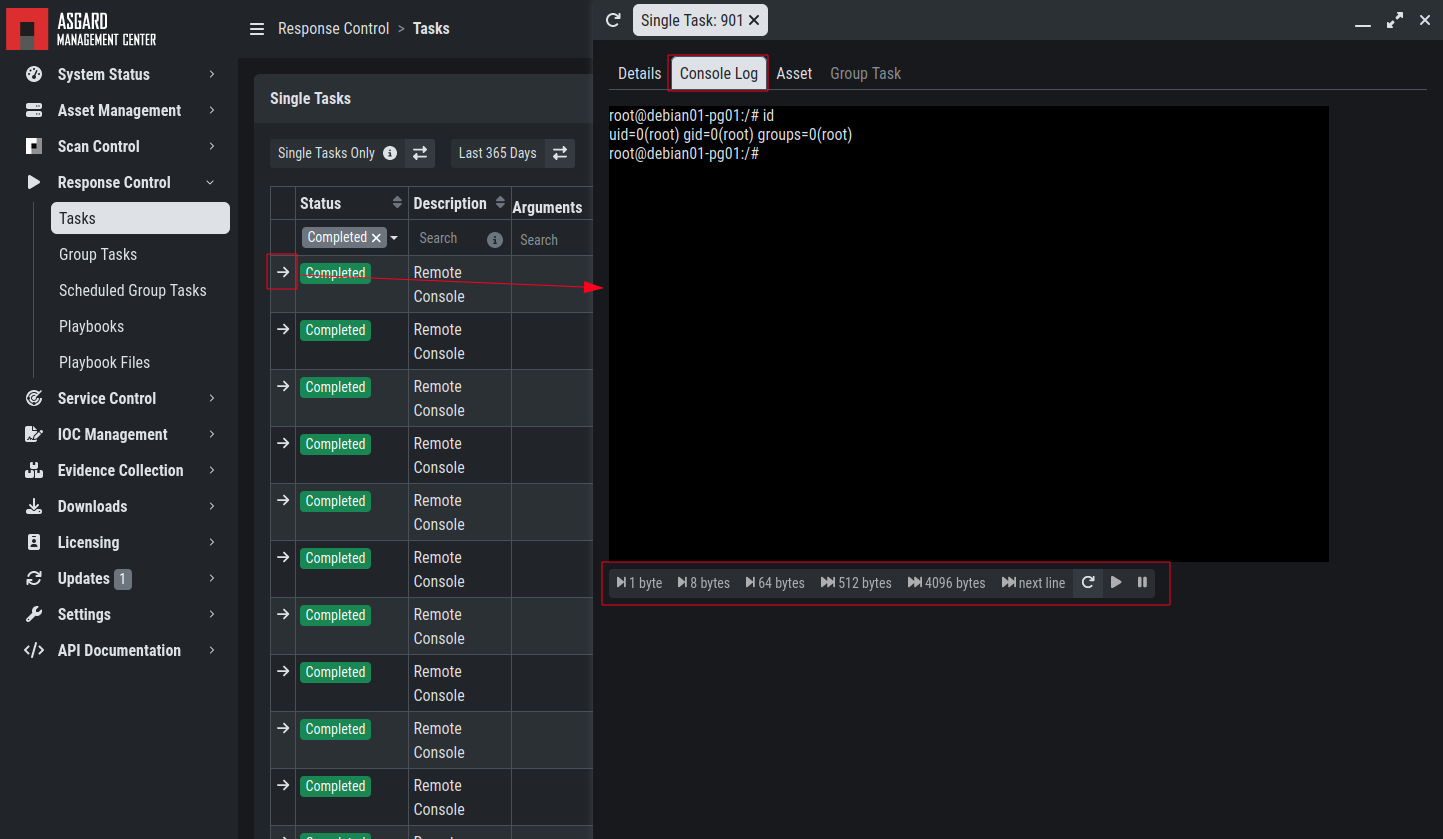
Replay Remote Shell Session
ASGARD users can only see their own remote console session. Only users with
the View Remote Console Log permission are able to replay all sessions from
all users.
Note
The permission View Remote Console Log requires the Response Control
permission.
3.11.2. Response Control with Pre-Defined Playbooks
In addition to controlling THOR scans, the Management Center contains extensive response functions. Through your Management Center, you can start or stop processes, modify and delete files or registry entries, quarantine endpoints, collect triage packages and execute literally any command on connected systems. All with one click and executed on one or multiple endpoints at once.
It is also possible to download specific suspicious files. You can transfer a suspicious file to the ASGARD Management Center and further analyze offline.
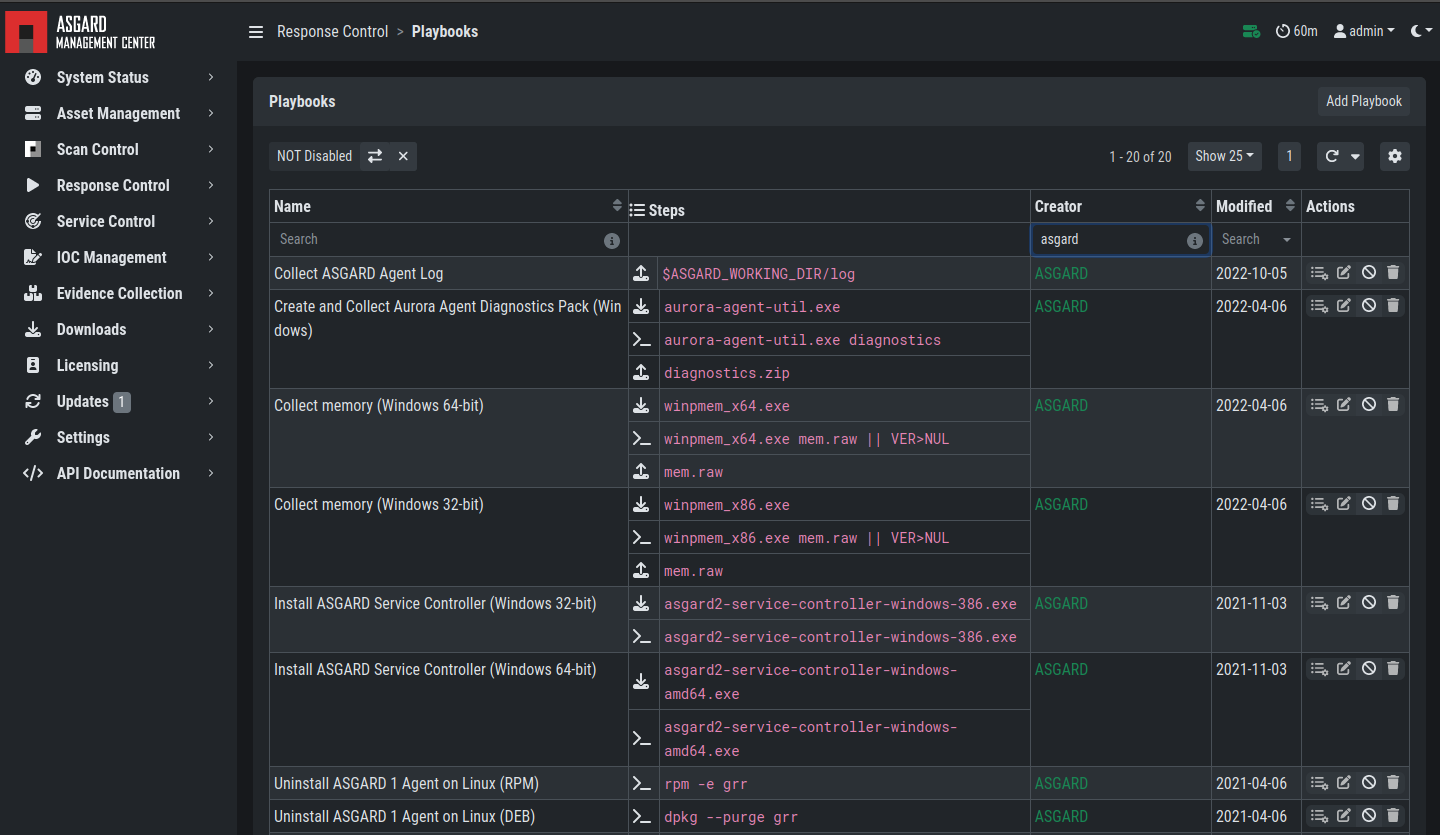
Built-in Playbooks
To execute a predefined response action one or more endpoints, navigate to the Assets view and either click the "play" button in the Actions Column, or selected multiple assets and press the "Add Task" button in the top right corner. This will lead you to a dialogue where you can select the desired action.
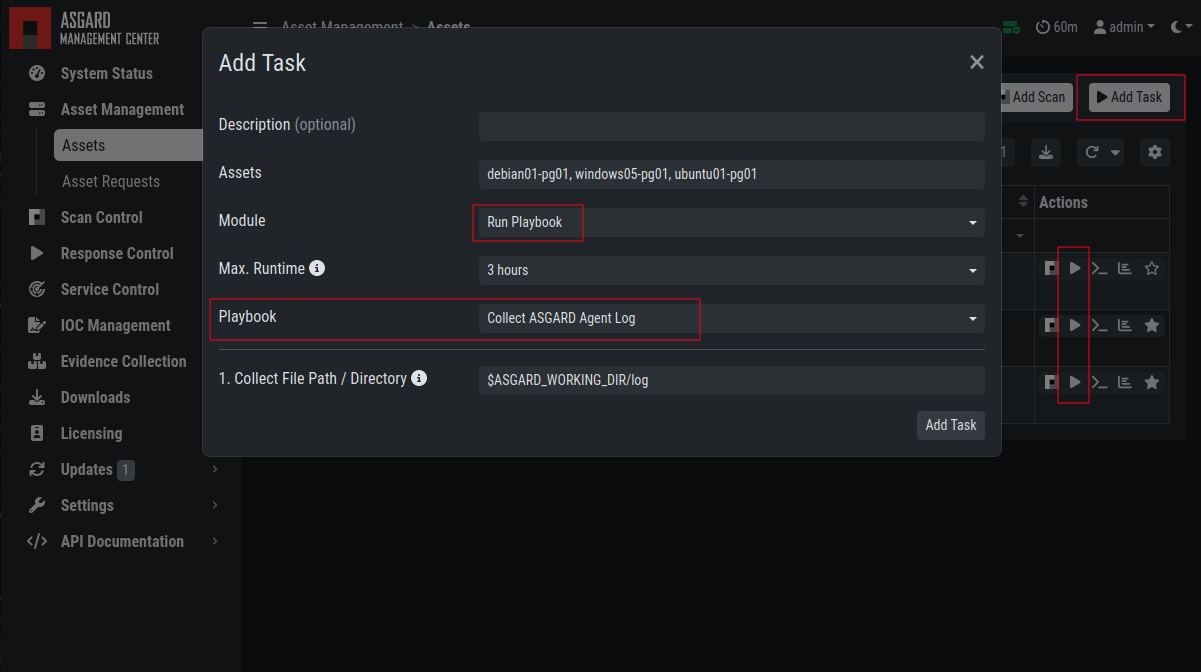
Execute Playbook on Endpoints
In this example, we collect the ASGARD Agent Logs.
ASGARD ships with pre-defined playbooks for the following tasks:
Collect ASGARD Agent Log
Create and Collect Aurora Agent Diagnostics Pack (Windows only)
Collect full triage pack (Windows only)
Isolate endpoint (Windows only)
Collect system memory
Collect file / directory
Collect directory
Collect Aurora diagnostics pack
Execute command and collect stdout and stderr
Warning
The collection of memory can set the systems under high load and impacts the systems response times during the transmission of collected files. Consider all settings carefully! Also be aware that memory dumps may fail due to kernel incompatibilities or conflicting security mechanisms. Memory dumps have been successfully tested on all supported Windows operating systems with various patch levels. The memory collection on Linux systems depends on kernel settings and loaded modules, thus we cannot guarantee a successful collection. Additionally, memory dumps require temporary free disk space on the system drive and consume a significant amount of disk space on ASGARD as well. The ASGARD agent checks if there is enough memory on the system drive and adds a 50% safety buffer. If there is not enough free disk space, the memory dump will fail.
3.11.3. Response Control for Groups of Systems
Response functions for groups of systems can be defined in the Group Tasks
tab or the New Scheduled Group Task tab.
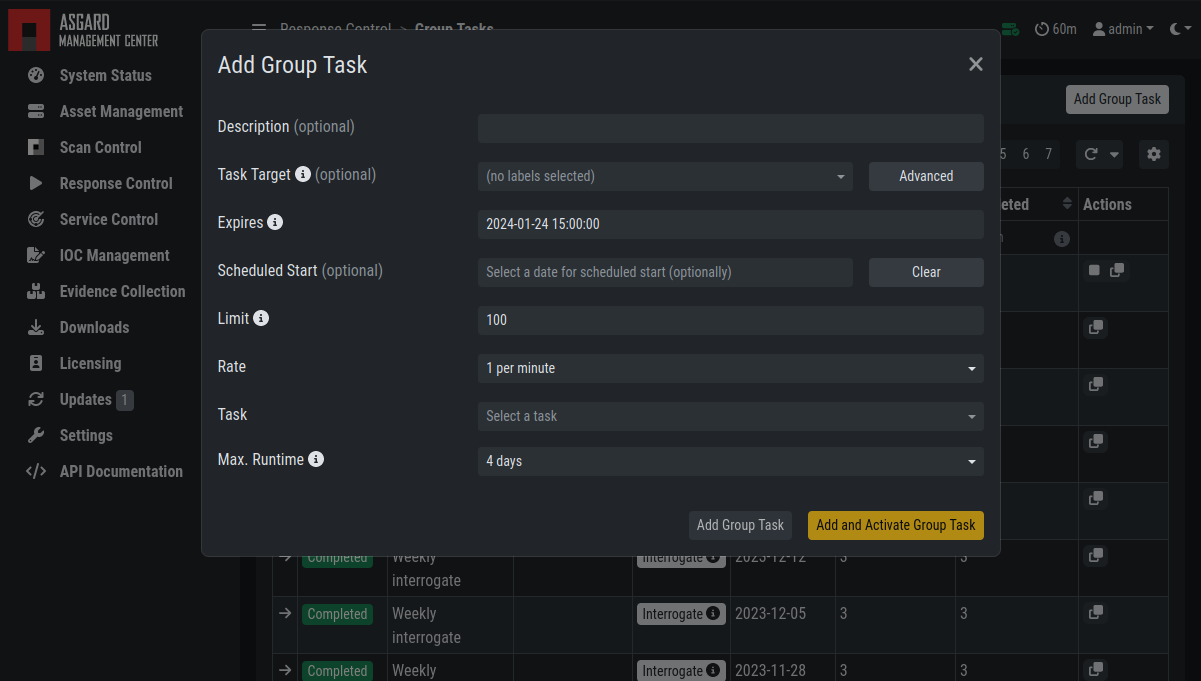
Execute Playbook on Group of Endpoints
This view should look already familiar, since it is similar to the Group Scan view. You can select the targets by either specifying one or more labels or by making use of the ASGARD Search Query.
3.11.4. Response Control with Custom Playbooks
You can add your own custom playbook by clicking the Add Playbook button in the
Response Control > Playbooks tab.

Add Custom Playbook
This lets you define a name and a description for your playbook. After clicking
the Add Playbook button, click on the Edit steps of this playbook action.
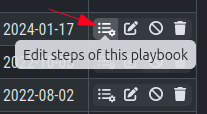
Playbook Action Items
This opens the side pane in which single playbook steps
can be added using the Add Step button.
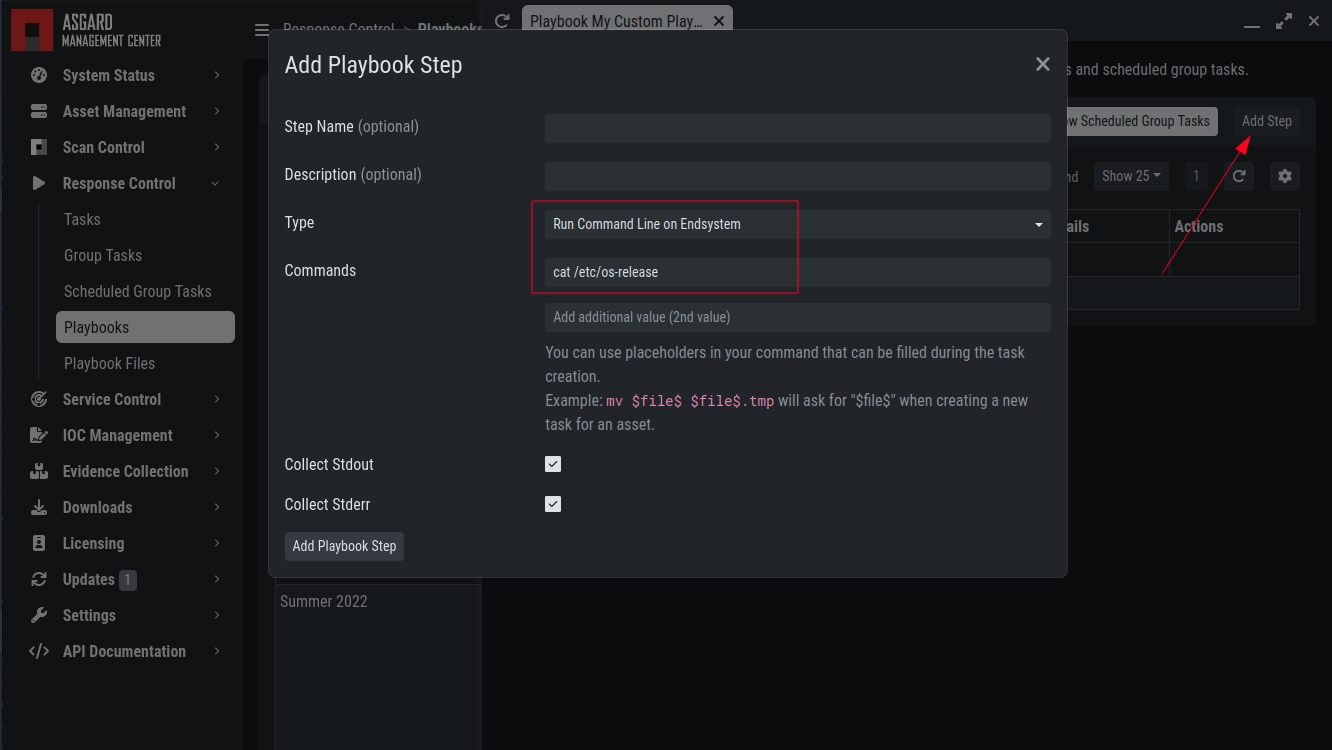
Add Playbook Entry
You can do create the following type of Playbook Steps:
Run Command Line on Endsystem
Upload File to ASGARD Management Center
Download File
from ASGARD Management Center
This allows you to download files from the Management Center to your endpoint and vice versa. This way you can directly collect evidence from your endpoints.
If you need custom files for your playbook (scripts, configurations, binaries, etc.)
you can do so by selecting Upload New File when setting the type to Download File
from ASGARD Management Center during the creation of the playbook step. Alternatively
you upload (and manage) new files at Response Control > Playbook Files.
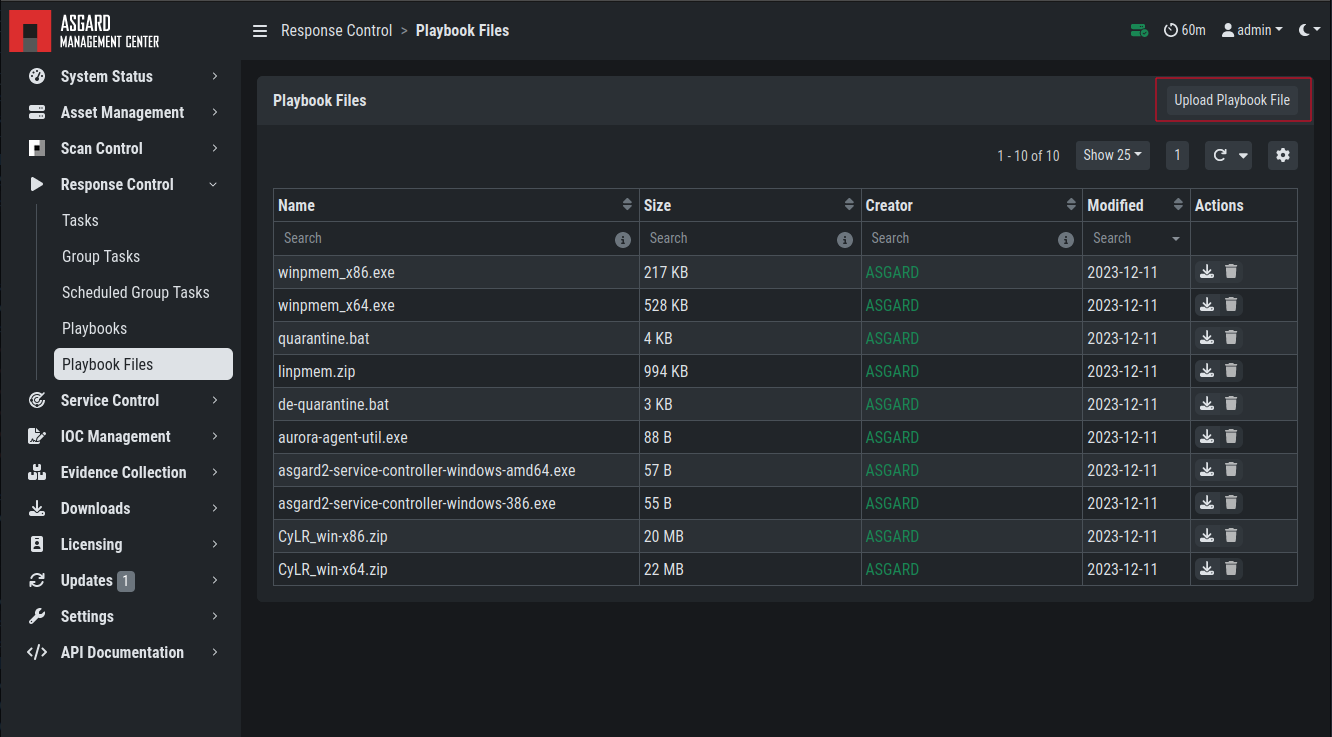
Manage Playbook Files
You can have up to 16 steps in each playbook, which are executed sequentially. If you execute a command the stdout and stderr can be reported back as well if you wish to do so.
3.11.5. Change the Asset(s) Proxy
You can change the Proxy Settings on your Assets via the Response Control.
To do this, select the asset(s) and click Add Task in the top right corner.
Next, set the Module to Maintenance and the Maintenance Type to
Configure the asset's proxy. You can now set your proxy. Multiple proxies
can be set, though only one FQDN/IP-Address per field can be set.
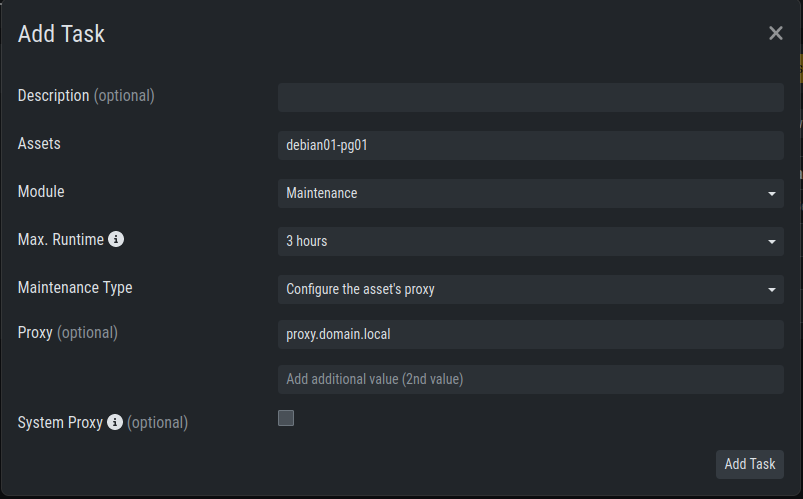
Change/Set an assets Proxy